Introduction
This guide provides information on how to search for files that reside in Microsoft Teams file storage. Whilst these files can be viewed from Microsoft Teams, it is often more straightforward to access the files directly from File Explorer.
Instructions
This assumes that Microsoft Teams files are synced to a user’s local computer such that they are available via File Explorer. See the following page for more information:
The advantage of using a local folder for storing Teams files is that the files can more easily be searched using standard file search tools. It is recommended that the Agent Ransack tool is installed on the local computer – this offers far superior performance to the Microsoft search facility. Agent Ransack is a free tool (its paid for version is called File Locator Pro). It can be downloaded from the following page:
Install the software – use the Lite version, which is free.
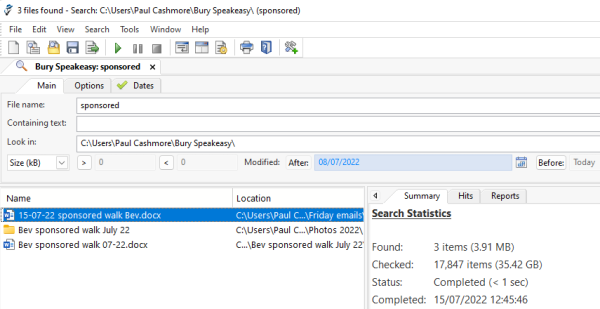
Once installed, you can right mouse-click on any folder in File Explorer and select the “Agent Ransack…” option (On windows 11, you may need to select “More Options…” before Agent Ransack appears). You can then specify a partial file name, or a file type: to search for all files which match your criteria in the selected search folder.
e.g.:
- specifying “sponsored” would find all files in the selected folder or any sub-folders, containing the word “sponsored”
- *.jpg to search for all JPEG files in the selected folder or any sub-folders
- *sponsored*.jpg to find any jpg fies which contain the word sponsored
