Introduction
SpeakEasy has access to the Microsoft Office 365 Business subscription for non-profit organisations, which provide access to Microsoft Teams and Microsoft Office applications at zero cost for a maximum 10 users. Additional users can be added for a small payment (currently £3.80 per additional; user per month). This guide describes how to configure a new user in the Office 365 organisation and grant them access to Microsoft Teams.
Instructions
Creating New Users
As a global administrator, login to the Office 365 Admin Center using the following link:
https://admin.microsoft.com/Adminportal
Click the Add User button. Provide the user details as requested. It is recommended that the username be set to the FirstName and LastName combined, e.g. for John Smith, this would be “JohnSmith”. See the screenshot below for an example:
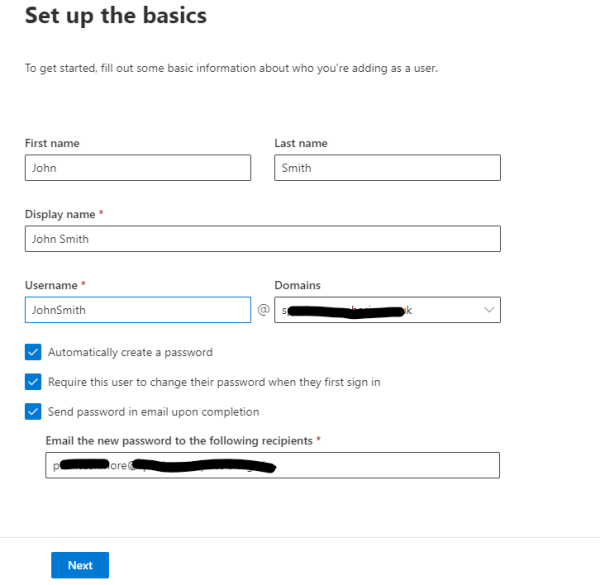
For the new user, there are two options regarding the initial password:
- (preferred option). Make sure the “Send password in email upon completion” is set to checked. In this case, the administrator will be prompted to enter an email address where the password will be sent. By default, this is the global administrator but it could also be sent to that user’s personal email address. Use a semi-colon to delimit each email address. The user can then use that password to login for the first time only, at which point they will be invited to change the password.
- Send password in email upon completion is left unchecked (as shown above). In this case, no password is known so the user has to click the “forgot password” link when trying to logon for the first time. They will then be requested to enter their mobile number and a code will be sent to it via SMS – once this has been entered into the login, the user will be invited to reset their password.
Click Next. Assign a Microsoft 365 Business Premium Licence. Assign licences as shown in the screen below:
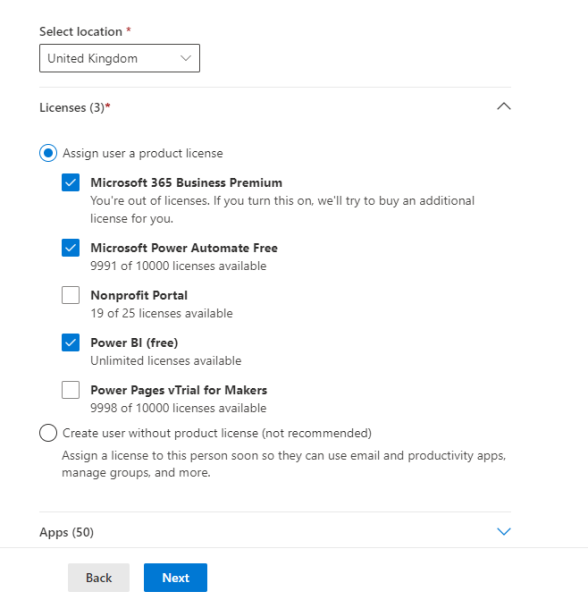
The “nonprofit portal licence” can be assigned, but it is recommended that it is only granted if that user is likely to need to access that portal for access to other Microsoft resources for non-profit organisations.
Click Next. Assign user roles. Typically, this will be “User: no administration access”. Only set this to something different if the user requires some form of administrative access. Click the expand chevron on the right-hand side of the screen to see the options. Global Administrator provides administrative access to everything so use with care – global administrators are already set up and should only change if someone leaves the organisation. The only admin option that may be required for some office users is the Teams Administrator – if granted, the user can fully administer Microsoft Teams but not other aspects of the organisation, such as email.
Click the chevron to the right-hand side of the “Profile info” section and provide as much information as possible in the requested fields.
Click Next. Review the information and click “Finish Adding”
Configuring a personal Email Signature
This can be configured by the new user by following the instructions in this document:
Creating a Personal Email Signature in Outlook
Configuring an Alternate Email Address
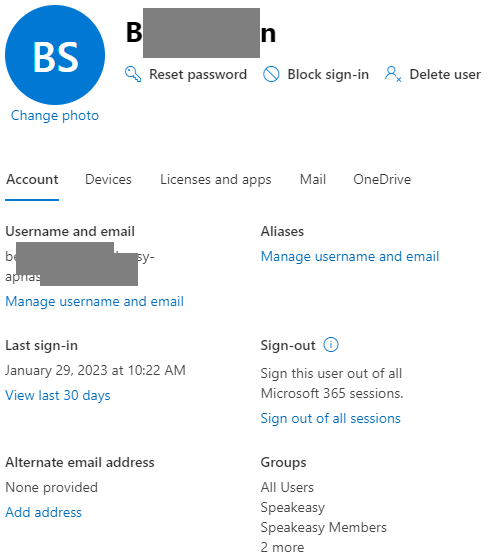
If a user forgets their password and gets locked out of their account, the alternate email address can be used to reset their password. This is usually a personal email, e.g. a user’s gmail account. To set this, from the list of active users, select the user and click the “Add address” link under “Alternate email address”. See the screenshot below, where the link can be see towards the bottom left-hand side:
Configuring Email Address Aliases
For a given user John Smith, with a user name of jsmith@microsoft.com, that user will only be able to receive email directed to that specific address. It may also be useful if a user could receive email directed at john.smith@microsoft.com or johnsmith@microsoft.com. To do this, configure email aliases. In the Active Users screen (as used for configuring Alternate Email Address above), click the vertical ellipsis next to a user and select the Manage Username and email option.
Assigning Users to Power Apps
Configuring access to Teams Files from File Explorer
This is definitely recommended as it enables users to have all the protections of files being stored in Microsoft Teams (e.g. version history, undelete), whilst accessing files in a standard way using File Explorer. It also makes it easier to share files with users external to the Speakeasy organisation. See the following document:
Configuring Access to Microsoft Teams Files from File Explorer