Introduction
This document describes how to use the SpeakEasy office printer, currently the HP OfficeJet Pro 8620, to scan a document. The guide includes instructions for copying the resulting files to Microsoft Teams or to a Citrix environment, if required. Instructions are also provided for combining multiple scans back into a single document.
Instructions
Scanning
First, ensure that the printer/scanner is turned on. The power button is on the bottom left hand side at the front.
Lift the lid on the top of the scanner and place the page to be scanned on the glass. The top of the page should be placed on the left hand side of the glass.
On the laptop, launch the “Windows Fax and Scan” program. This can be found by clicking the Windows button in the bottom left hand side of the scree and typing “Fax”.
In the “Windows Fax and Scan” program, click the “New Scan” button. The scanner should commence scanning and the captured image should appear in the bottom right hand side pane of the program. Note: if scanning a document consisting of multiple pages, each page must be scanned separately. Each scanned image will be saved to the “Documents\Scanned Documents” folder. A list of scanned documents is also provided in the top right hand side pane of the program.
Collating scans from a multi-page document into a single document
A scan of a multi-page document results in multiple .JPG files being created. This can be a little unwieldy, e.g. when trying to peruse the document page by page (users have to open one file, then close, then locate the next page and open that file). It is also more cumbersome when trying to share the scans with others.
It is however possible to collate the scans back into a single document. From a web browser, launch the following free tool:
https://jpg2pdf.com/ . This tool enables many different conversions. The default that we would use is to combine JPG to PDF. See the example screenshot below:
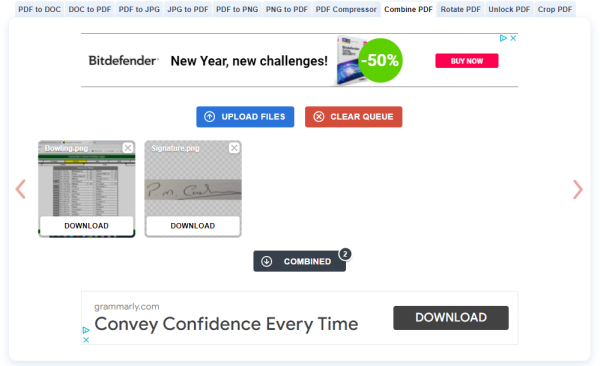
To use the tool, simply click the “Upload Files” button and select the names of the files to be scanned, or drag the files into the area marked “Drop Your Files Here”. Make sure to add the files in the page order of the original document. The tool supports a maximum of 20 pages (but see the next section for ways around this). Click the “Combined” button to download a document which will contain each of the scans combined into a single document. This can then be stored in Teams in the usual way.
Combining Scans from Documents with more than 20 Pages
Let’s assume that a 30 page document needs to be scanned. This results in 30 .JPG files, one for each page. Firstly, using the instructions given above, scan the first 20 pages combine them into a PDF document. Repeat for the remaining 10 scans and combine into a second PDF document. Next, use the “Combine PDF” option within the https://jpg2pdf.com/ tool to combine the two PDF documents into a single PDF.