Help Center
- PWAs (persons with aphasia) and associated carers,
- Staff/Volunteers/Trustees
- Speech and Language Therapists and associated SLT teams
- Guests
This app is optimised for use on a PC or tablet as each screen attempt to make the most use of the screen space available on a desktop PC or table. Note: there is also a “Speakeasy Membership phone app” which is a very similar application to that described in this guide, but that application is optimised for use on smartphones. A guide on its use can be found here: How to use the Speakeasy Contacts Phone App
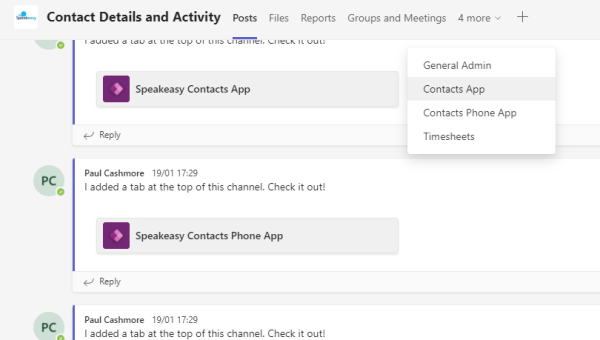
Launch the membership app from Microsoft Teams. There is a “Speakeasy Contacts” tab available via the Speakeasy…Contact Details and Activity team. See the screenshot below:
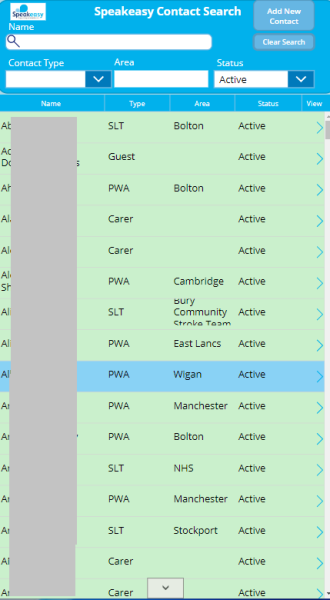
The app should appear. See the example screenshot below (personal details on the left-hand side have been obfuscated):
- Awaiting Triage by Julie – a new PWA referral has been received and Julie Hickin needs to speak to the member to decide if their condition is one where Speakeasy can help.
- Follow-up required – Julia Hickin has performed triage but other follow-up activities are required to be performed by other Speakeasy staff before the PWA can be made fully active.
- Active – an active contact, who also attends group meetings and other workgroup sessions
- Active – email only – an active PWA who only makes contact via email – they typically receive weekly email newsletter updates
- Archived – a contact who no longer requires help from Speakeasy or who is now deceased
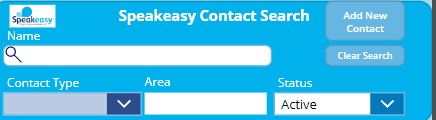
To reset the search details back to the default, click the “Clear Search” button near the top right hand side of the app. The default search returns all contacts with statuses of “Active” and “Active – email only”.
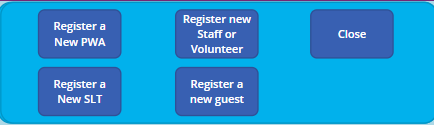
Adding a new Contact
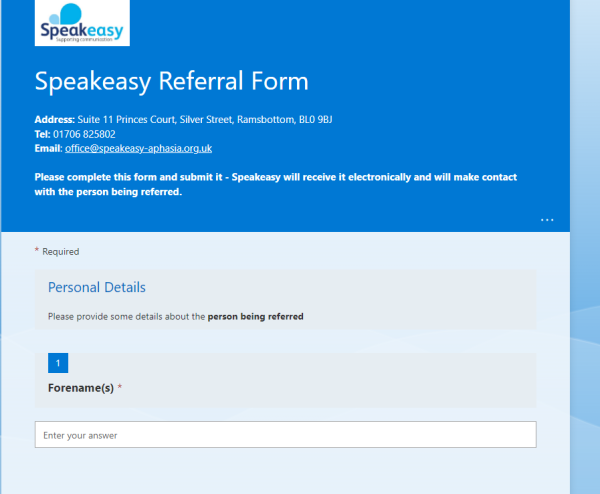
A screen will appear, similar to that shown below:
The form is the standard method by which anyone refers a person with aphasia (PWA) to Speakeasy. Complete the details on the form and click the submit button. A background process will then automatically create a new entry (known as a record) in the Speakeasy membership database. This usually occurs within 30 seconds of form submission.
Adding Staff/Volunteer/Trustee/Student
To register a new Staff/Volunteer/Trustee or Student, click the “Register new Staff or Volunteer” button. This will launch the following electronic form:
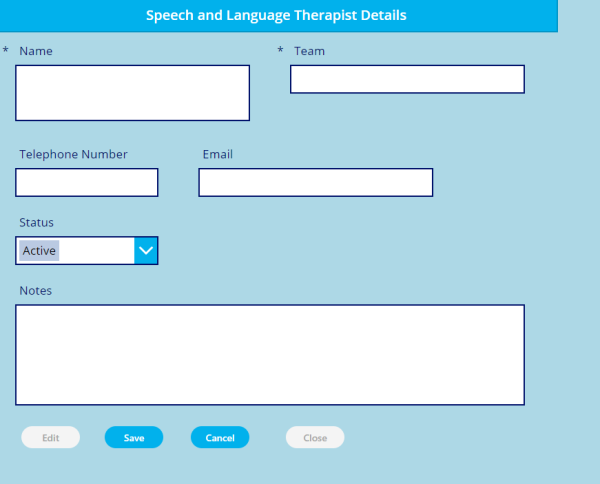
Adding an SLT
To register a new SLT, click the “Register a New SLT” button. The following screen will appear:
Adding a Guest
To register a new guest, click the “Register a New Guest” button. The following screen will appear:
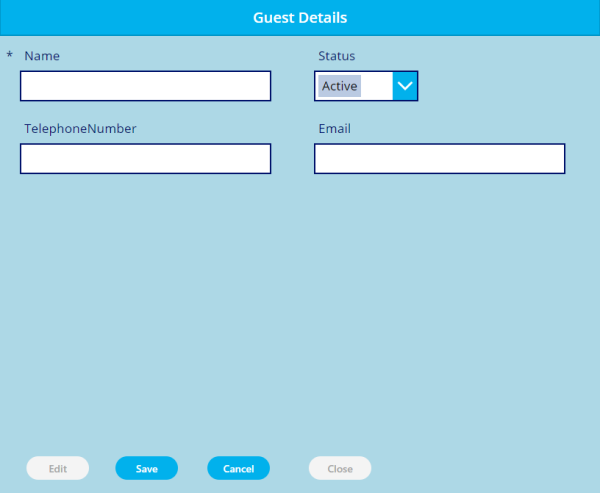
Fill out the fields and click the tick button in the top right-hand side of the screen to save them.
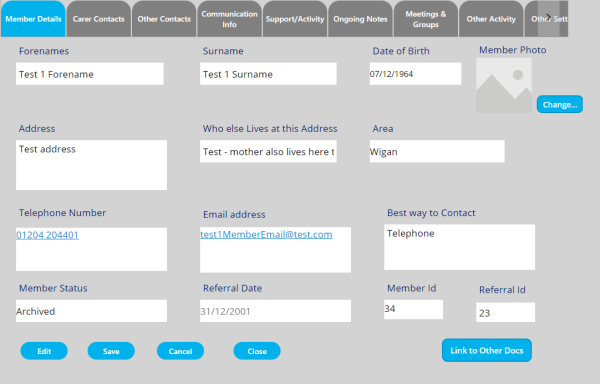
The tabs that appear at the top of the application screen will vary according to the type of contact that has been selected. For a PWA contact, information includes carer contact details, information on communication preferences, case notes, details of which meetings a contact has attended which groups the contact is a member of. For a guest, or staff/volunteer, there will only be a single tab to show contact information. As a PWA is the most complex contact type, the rest of this document describes how to edit PWA details.
To edit contact details, click the “Edit” button near the bottom left-hand side of the app. See the image above. These buttons appear from any selected tab. See the example screenshot below which is the same screen as the preceding screenshot, but in edit mode rather than view mode:
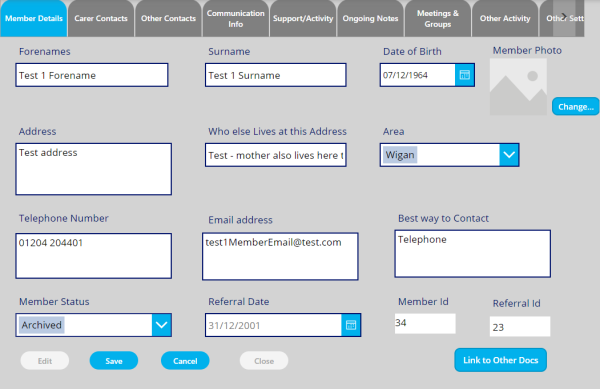
It can be seen that, in edit mode, telephone numbers and emails change from being links to just being text fields. Simply click in any field and edit the details as appropriate. To save changes, click the “Save” button. To cancel and discard all changes, click the “Cancel” button. To return to the application home screen, which shows a list of members, click the “Close” button.
A contact can be emailed from the app simply by clicking an email address – a draft email will be created to that contact. Contact email addresses stored in the app include those for:
- the member, i.e. the PWA
- the member’s main and secondary carer
- the referrer (the one who submitted the form)
- the PWA’s SLT
- the PWA’s social worker
Where the desktop PC supports it, via the installation of additional software clicking on telephone numbers can also result in a call being made to the selected contact number – note that this feature is typically used from a smartphone via the similarly featured Speakeasy Membership App (PC version).
To see which membership groups a PWA is a member of click on a member’s details and navigate to the “Group Registration” tab:
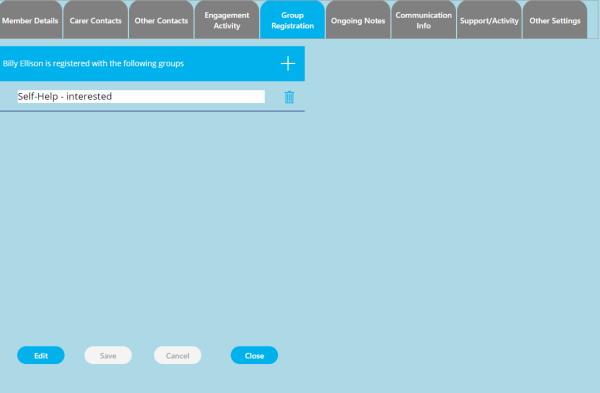
A PWA can be added to or removed from a membership group registered with another group by clicking on the plus icon or the trashcan icon respectively. Note: there is a separate app for administering group membership (and creating new or deleting existing groups) as it makes it easier to administer membership in bulk, so it is recommended to use that app. See How to use the Speakeasy Groups and Meetings app for more information.
Viewing PWA Engagement Activity (Including Meeting Attendance)
From a funding perspective, it is often important to record all activity involving engagement with the PWA. This includes any attendance at Ramsbottom Cricket Club, attendance to group sessions and any one-to-one sessions. To view this engagement activity, click on a PWA’a details and navigate to the “Engagement Activity” tab:
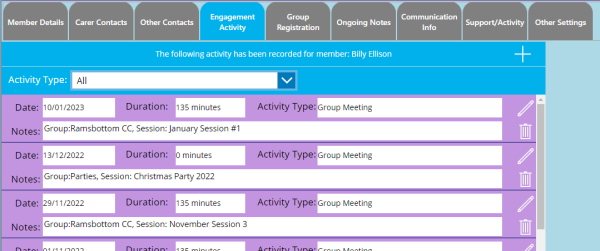
The engagement activity is listed in descending order of date (i.e. most recent first). The information can be filtered by using the “Activity Type” dropdown. The default view shows all activity. Additional activity can be recorded by clicking the plus sign towards the top right-hand side of the app. Note, first click the Edit button – at which point the “+” button turns green and can be clicked. The following screen will appear:
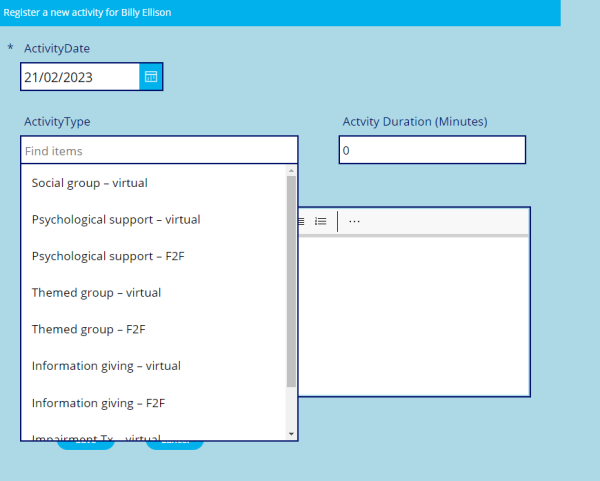
Fill in the fields and click the “Save” button, or “Cancel” to cancel adding the new activity. Existing activity records can also be edited,. However, meeting attendance can only be viewed from this app and not edited or deleted. To register or edit meeting attendance, use the the speakeasy meetings app. See How to use the Speakeasy Meetings App.
New activity types can only be added by an administrator via the following link: https://speakeasy570.sharepoint.com/sites/BurySpeakeasy-SLTManchester/_layouts/15/FldEdit.aspx?List=%7BF325E024%2D40E1%2D42FA%2D8D7D%2D9FEB28D417ED%7D&Field=ActivityType. From this page, edit the contents of the “Type each choice on a separate line” box. Please leave existing activities in the box – removing or renaming an existing activity could cause loss of data if a member has already been recorded as performing that activity.
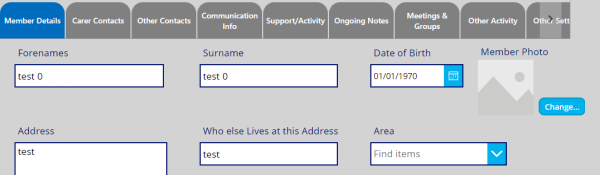
It is useful to have a photo of a PWA or Staff/Volunteer. The easiest way to achieve this is to launch the app from the smartphone app. However, it can also be done via a PC, For a PWA. navigate to the contact whose image you wish to add or modify, then click the “PWA Details” tab. Click the “Edit” button at the bottom of the app to enter Edit mode. A “Change…” button will then be enabled – see below:
Click the “Change…” button. A screen will then appear which will allow you to view a camera feed. See the example below:
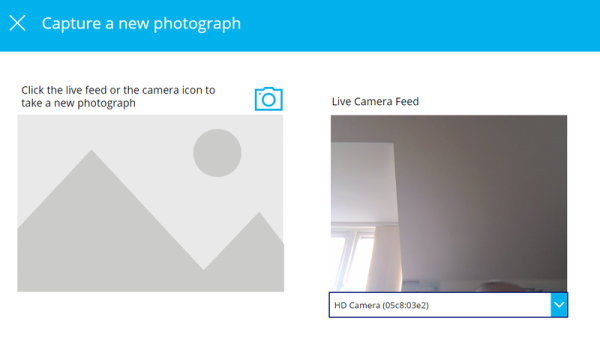
Choose the appropriate camera from the dropdown list near the bottom of the app screen – on a desktop PC, there is typically only one camera. Click the camera icon or click in the Live Camera Feed picture to capture an image. The captured image is viewed in the left-hand side screen.
Keep taking new images until you are satisfied with the end result, then click the tick icon at the top right-hand side of the app – this only appears after the one image has been captured. Alternatively, click the cross in the top left-hand side of the app to cancel. If the tick icon was clicked, the screen will return to the “member Details” tab and show the new image. Important: this image now needs to be saved by clicking the “Save” button that appears at the bottom of the app.
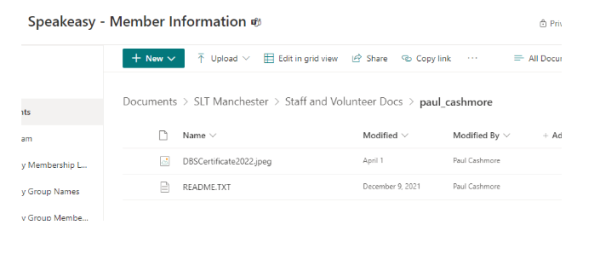
It is assumed that a photograph of the DBS certificate has been taken and is available as a file on a PC, or that a scan of the certificate has been made and stored as an image or a PDF. Click the Upload button and specify the image or PDF file. This will then be uploaded. See an example screenshot below: