Introduction
This document describes how to use the Speakeasy Groups and Meetings app to edit the membership of various Speakeasy activity groups and to record attendance at meetings of those groups.
Instructions
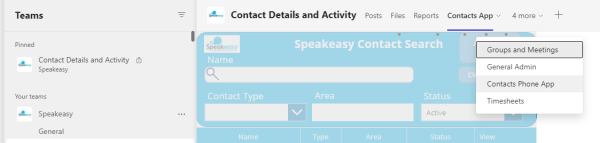
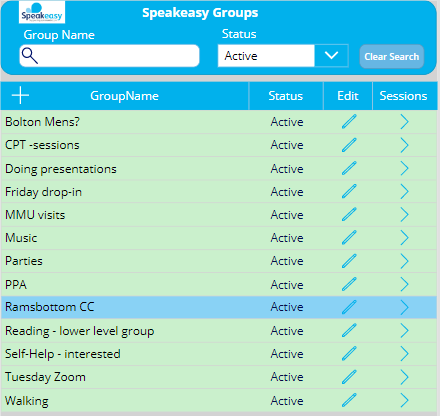
Launch the Speakeasy Groups and Meetings app from Microsoft Teams. There is a “Groups and Meetings” tab available via the Speakeasy…Contact Details and Activity team. See the screenshot below:
Creating a New Group
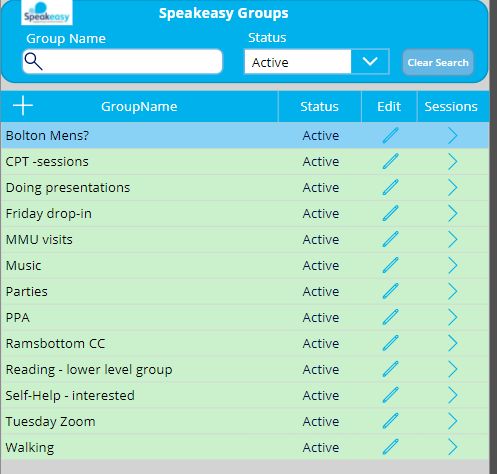
To create a new group, from the application home screen click the “+” sign to the left of the GroupName item in the title banner – see the screenshot above.
Editing a Group
To edit an existing group, from the application home screen click the pencil icon which appears under the “Edit” heading column. A screen will appear, similar to the following:

- groups without a fixed membership. In this case, the “Limit attendees to group members” is set to “No” (as in the screen above). This type of group is used where anyone can attend the group, e.g. the Ramsbottom CC meetings.
- groups with a fixed membership. In this case, the “Limit attendees to group members” would be set to “Yes”. This type of group is used where the group consists of a limited membership, usually contacts who have previously registered their interest to attend various closed meeting sessions. See the screenshot below, which shows the screen appearance when “Limit attendees to group members” is set to “Yes”:
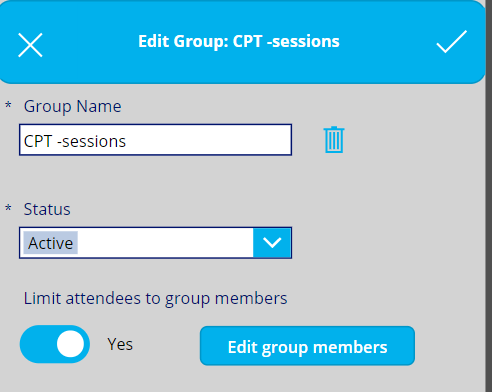
It can be seen that an “Edit group members” button appears.
Adding a New Member to a Group
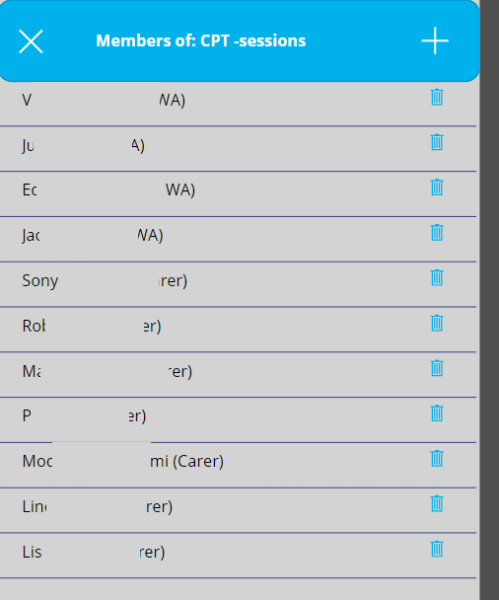
To edit the members of an existing group, click the “Edit group members”button. A list of group members should appear, similar to that shown below (the names are obfuscated due to GDPR regulations):
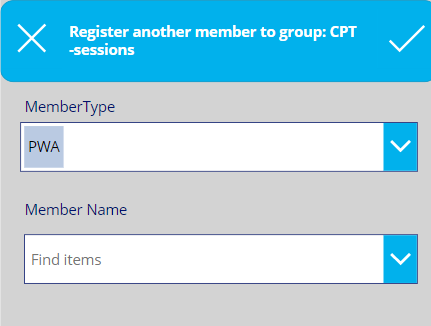
To add a member, click the “+” icon in the top right-hand side of the App. The following screen will appear:
Removing a Member from a Group
From the application home screen, select a particular group. A list of members should appear, similar to that shown below (the names are obfuscated due to GDPR regulations):
Simply click the trashcan icon to the right of the group member’s name to remove that member from the group.
Deleting a Group
Email Distribution Lists
Creating a Group Session (i.e. a meeting)
A new group session can be created by clicking the “>” chevron for one of the groups, under the “Sessions” column. See below:
The screen below shows the sessions when “Ramsbottom CC” is selected:
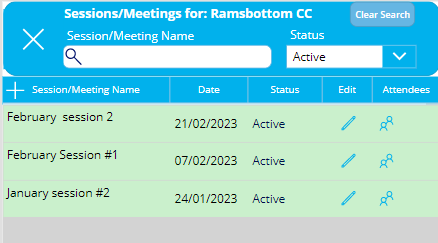
A new session can be created by clicking the + button in the blue column header, to the left of the “Session/Meeting Name” (see the image above). After the + button is clicked a screen will be displayed similar to that shown below:
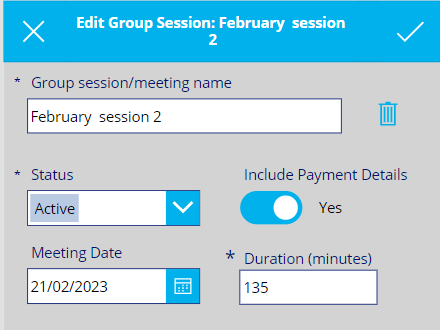
Specify a name for the session, plus the date – leave the status as “Active”. Specify a duration for the session. e.g. Ramsbottom CC meetings typically last 135 minutes. If payments will be taken during the session, make sure the “Include Payment Details” setting is set to “Yes”. Click the tick at the top right hand side of the app to save the session, or click the cross in the top left hand side to cancel without saving.
Editing/changing the Group Session Details
To edit an existing group session title or date, click the pencil icon which appears under the “Edit” heading column:

The screen below shows the results of editing session “February session 2”:
Adding Attendees to the Group Session
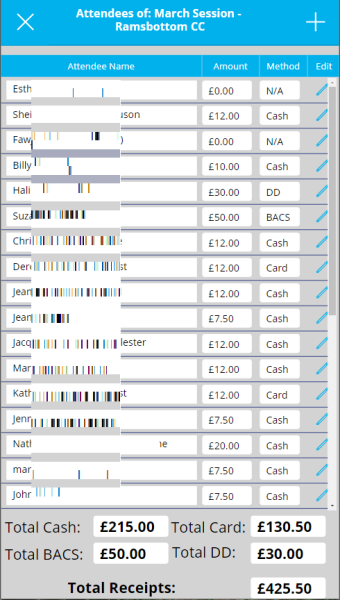
To add attendees to a group session, click the appropriate people icon (the icon to the immediate right of the pencil icon). The screenshot below shows details of a previous Ramsbottom CC session, including grand totals of payment details (names have been obfuscated for GDPR reasons):
However, for a newly registered group session, the screen that will be displayed will look blank:
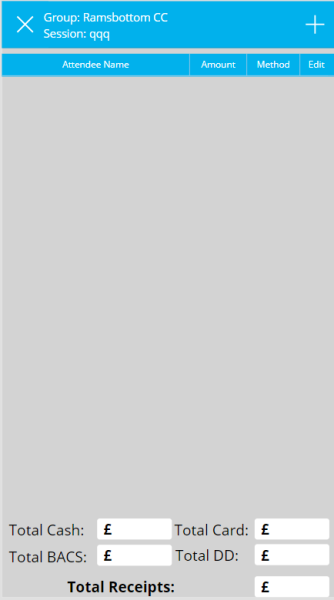
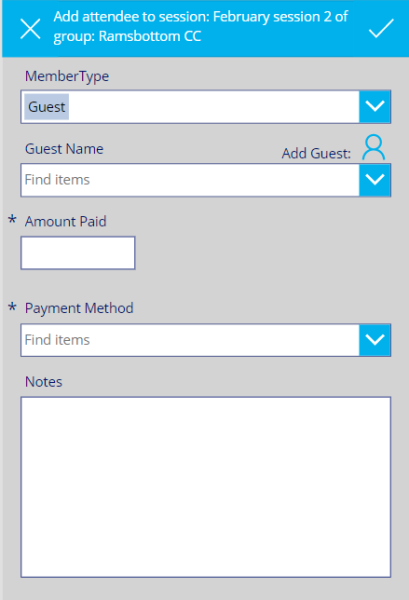
Click the + button at the top right hand side of the app. The following dialog will appear:
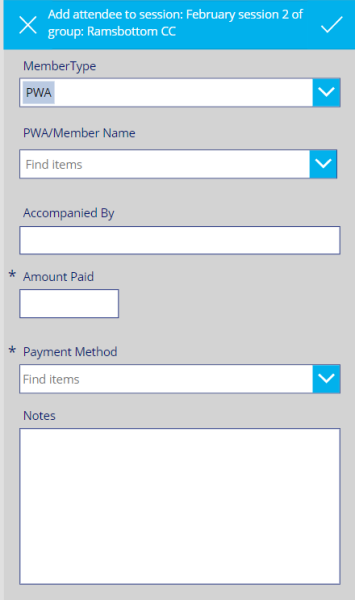
- if the user selects “PWA”, they can then pick from a list of all active PWAs
- if the user selects “PWA and Carer”, they can then pick from a list of all active PWAs, and then pick a carer from the selected PWA’s list of associated carers.
- if the user picks “Staff/Volunteer”, they can then pick from a list of all active Staff/Volunteers.
- if the user picks “SLT”, they can then pick from a list of all active SLTs.
- if the user picks “Guest”, they can then pick from a list of all active guests or register a new guest. See the next section for instructions on how to do this
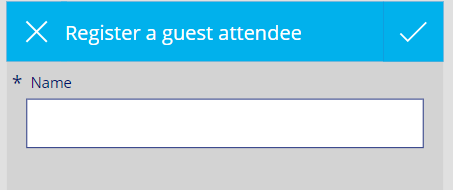
Registering a Guest Attendee