Introduction
This document describes how to use the Timesheets app to record details of time booked to various projects, plus any associated expenses which may have been incurred. By recording this data for all staff, Speakeasy is better able to provide up to date reports on project expenditure.
Instructions
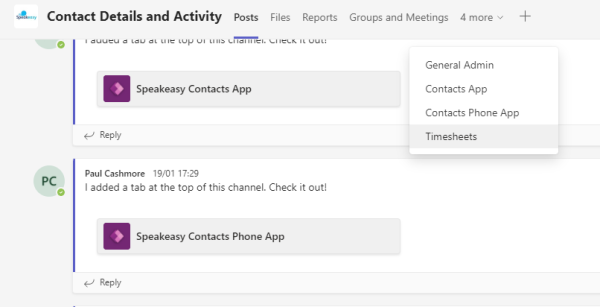
Launch the membership app from Microsoft Teams. There is a “Timesheets” tab available via the “Speakeasy…Contact Details and Activity” team. See the screenshot below:
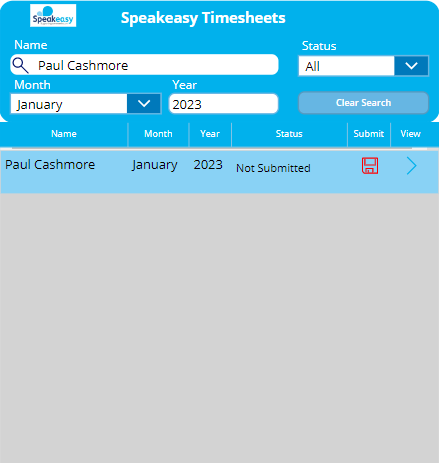
The app should appear. See the example screenshot below:
Recording Timesheet Entries
To add timesheet entries, click on the timesheet entry, but don’t click the red submit button at this stage. The following screen should appear:
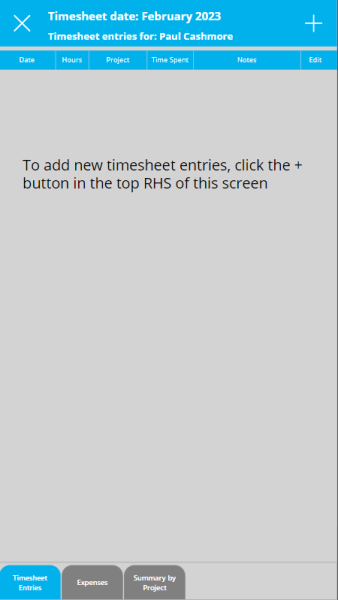
To add a new timesheet entry, click the “+” at the top right-hand side of the screen. The following screen should appear:
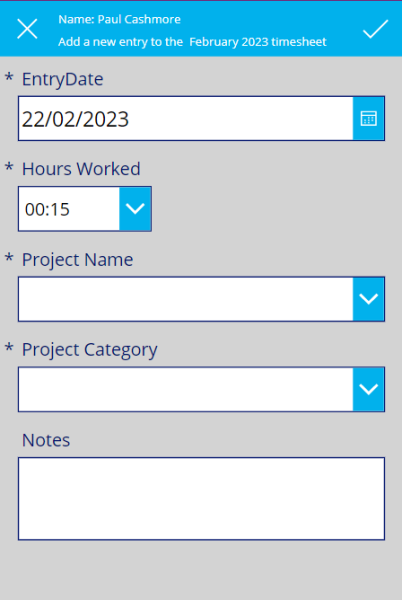
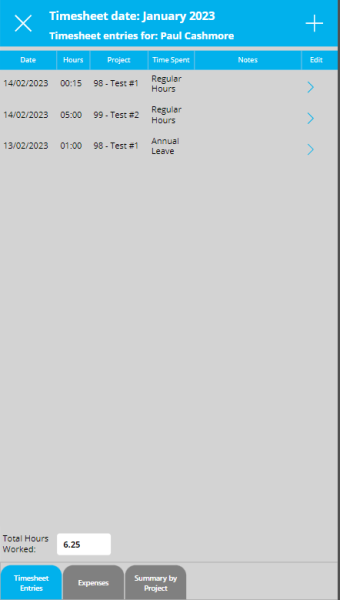
Complete the date, project details and any notes that help explain how time is spent, then click the tick in the tip right-hand side of the screen to save the details. The app will then show all recorded timesheet entries, together with a total of hours booked, which appears near the bottom of the screen. See the example below:
To edit an existing entry, simply click on it, make any changes, then click the tick in the top right-hand side of the screen, which is similar to the technique used for creating new timesheet entries.
Recording Expense Entries
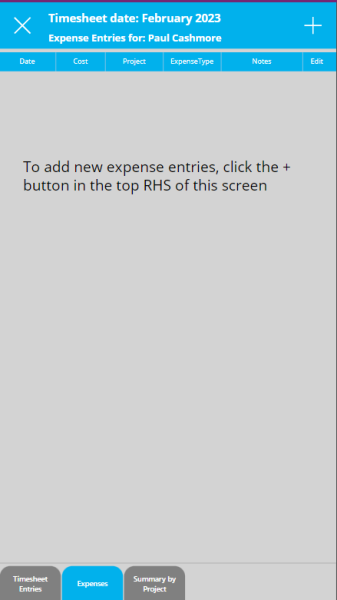
Recording expenses is similar to that for timesheets. Click on the “Expenses” tab at the bottom of the app screen. The following screen will appear:
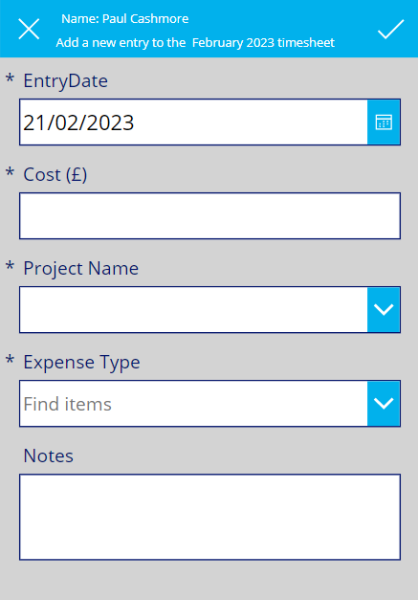
To add a new expense entry, click the “+” at the top right-hand side of the screen. The following screen should appear:
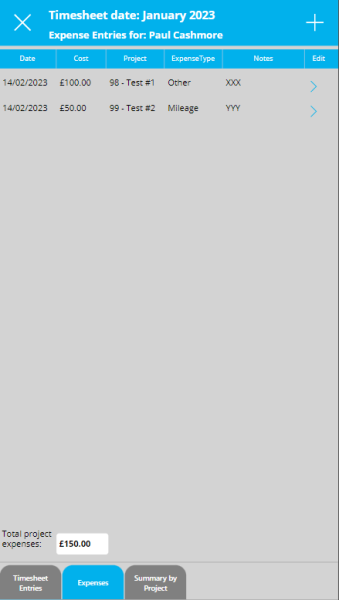
Existing expense entries can be modified by clicking on an entry, modifying the details and clicking the tick at the top right-hand side of the screen to save.
Timesheet Summary
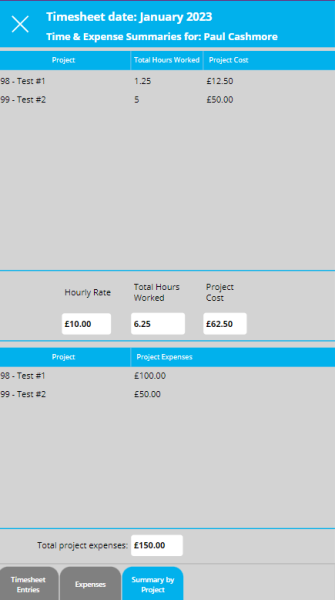
A summary of all time and expense details recorded against a timesheet can be seen by clicking on the “Summary by Project” tab at the bottom of the app screen. A screen similar to the following will appear:
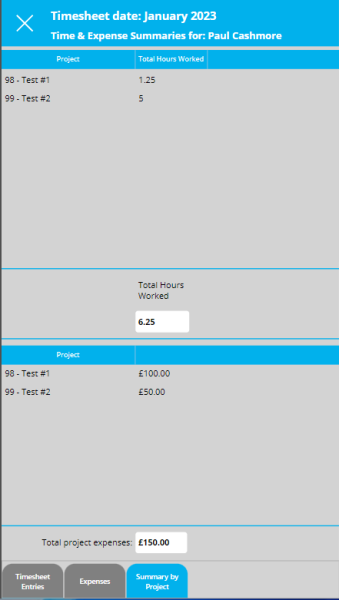
Time and expenses are summarised into projects, and grand totals are displayed, which will have the same values as the totals displayed in the “Timesheet Entries” and “Expenses” tabs.
Submitting a Timesheet
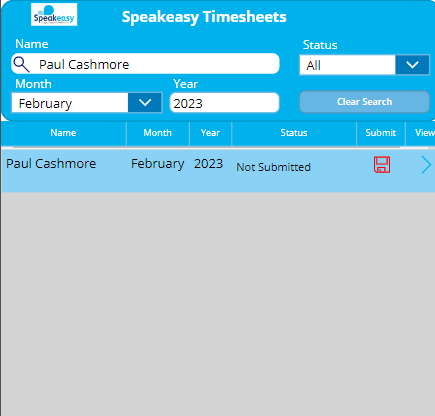
To submit a timesheet, click on the red button on the application home screen:
Timesheet Administrators
- If the staff member has a “Staff Payment Method” value set to “Salary”, an email will be sent, containing an attachment with a summary of project time, to the distribution list payrolladministrators@speakeasy-aphasia.org.uk. The members of this list include the accountant, who will receive the notification so that they can calculate monthly pay.
- If the staff member has a “Staff Payment Method” value set to “Invoice” (i.e. the staff member invoices Speakeasy for the work they have undertaken), an email will be sent, containing an attachment with a summary of project time, an email will be sent, containing an attachment with a summary of project time, to the distribution list invoiceadministrators@speakeasy-aphasia.org.uk. The members of this list does not include the accountant – one of the members of this distribution list will typically be the chief executive, who will be responsible for paying the invoice.
The job runs once every 30 minutes, so there should be usually be time to revert a timesheet’s status if it has been incorrectly changed to “Approved”.
Calculating Project Salary Costs
For administrators, the timesheets app includes a “Project Salary Costs” tab. This calculates the actual salary cost that can be attributed to a project, based upon the proportion of time that a staff member has spent on each project during the timesheet period (usually one calendar month) and the salary that the staff member received – see the section “Setting the Salary” for information on how to assign this value.
IMPORTANT: the salary a member earns is obtained from Xero – this is their salary net of National Insurance, income tax and pension contributions. Speakeasy pays these additional costs which appear in Xero as separate transactions. These are also distributed across multiple projects, so the gross salary cost is accounted for.
See the following examples to understand how project salary costs are calculated:
- A staff member earned a salary of £1000 (i.e. the salary transaction in Xero was listed as £1000) and incurred no expenses. They spent 75% of their hours on Project A and 25% of their hours on Project B.
The staff cost would be £750 to project A and £250 to project B – the total would be £1000.
- A staff member earned a gross salary of £1000 (i.e. the salary transaction in Xero was listed as £1000) and incurred expenses of £200 and has expenses paid within their salary. They spent 75% of their hours on Project A and 25% of their hours on Project B.
The staff cost would be £600 to project A and £200 to project B – the total would be £1000.
- A staff member earned a gross salary of £1000 (i.e. the salary transaction in Xero was listed as £1000) and incurred expenses of £200 but has expenses paid separately to salary. They spent 75% of their hours on Project A and 25% of their hours on Project B.
The staff cost would be £800 to project A and £200 to project B – the total would be £1000. – a separate payment would be made to the staff member for the £200 expenses
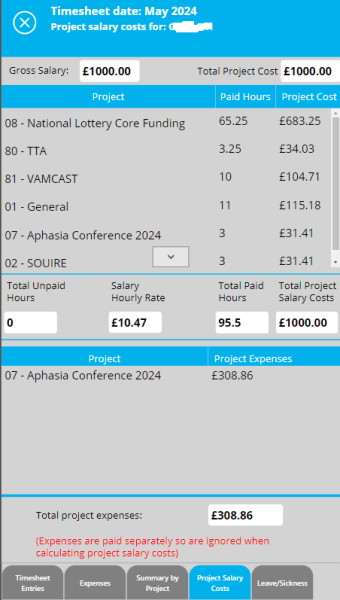
Whether a staff member is paid expenses as part of their salary or paid expenses separately is determined by the “Expenses are paid with salary” setting in the contacts application. The two screenshots below show two comparative examples:
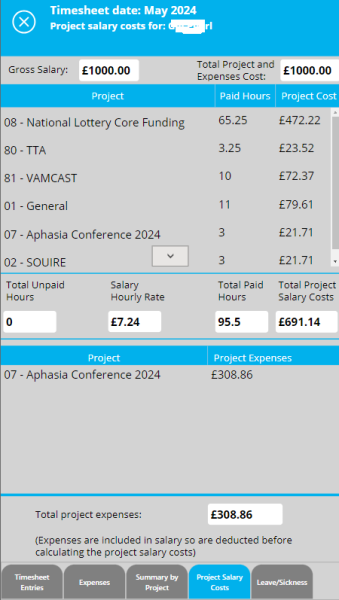
The image on the left shows the allocation to each project for a monthly salary of £1000 where project expenses were £308.86, where these expenses were paid with salary. The total monies attributable to time spent on all projects is £1000-£308.86 = £691.14, which is then distributed across all projects based upon the proportion of time spent on the project.
The image on the right shows the allocation to each project for a gross monthly salary of £1000 where project expenses were £308.86, where these expenses were paid separately to salary. The total monies attributable to time spent on all projects is £1000, which is then distributed across all projects based upon the proportion of time spent on the project.
Setting the Salary
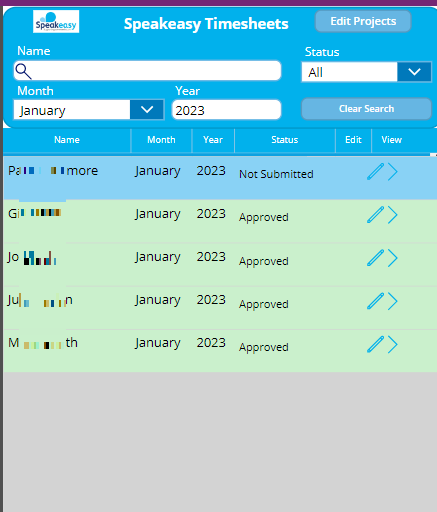
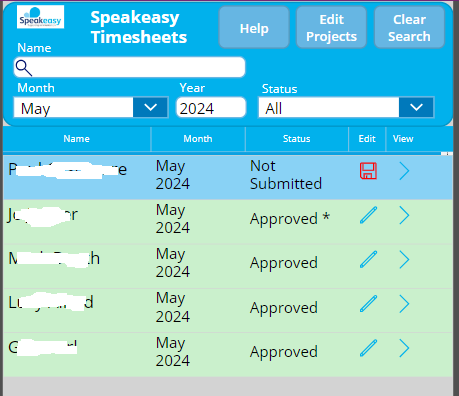
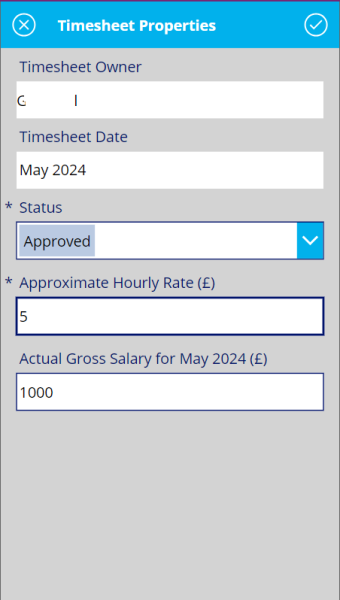
Actual salary values for each staff member can be obtained from the Xero accounting package. These values can then by entered by an administrator by selecting the appropriate month and year, then clicking the pencil icon against clicking for a staff member – see the example screen which shows timesheets for May 2024 – the pencil icon is to the right of the “Status” value:
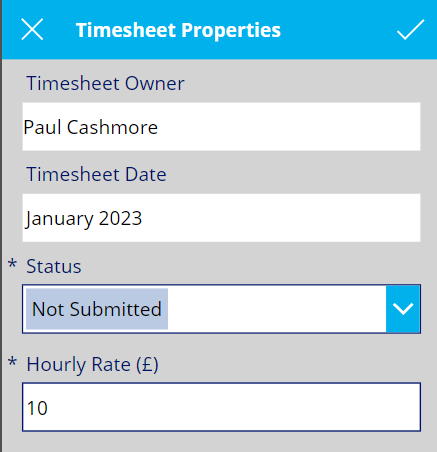
Having clicked on the pencil icon, the following screen will be displayed. The actual gross salary can be entered here and the value saved by clicking the tick in the top right hand corner of the application.
Having saved the gross salary value, the following screen will re-appear. Click on of the chevrons to the right hand side of the screen then click the “Project Salary Costs” tab to see the corresponding values now the gross salary has been set. These values are typically then copied back into Xero so that a record is kept of project salary costs in Xero, ensuring the profit and loss account for each project is more accurate.
Note: where a staff member has not had a gross salary entered, that member will have an asterisk against their status value – the second staff member in the above screenshot is an example of this.
Assigning a Timesheet Administrator
Timesheet administrators are assigned by accessing the Speakeasy Contacts App, navigating to a staff/volunteer contact and editing the details Click on the “Other Settings” tab. The “Can Administer Timesheets” should be visible and can be changed to “On”. See the screenshot below, taken from the Speakeasy Contacts Phone App:
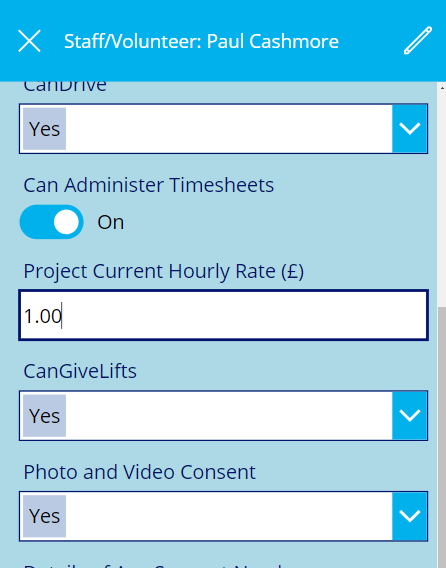
Changing the Default Hourly rate of a Staff Member
The default hourly rate can be changed by accessing the Speakeasy Contacts App, navigating to a staff/volunteer contact and changing the “Project Current Hourly Rate” value. When a new timesheet is created at the start of the next new month, the timesheet will use the new value. See the screenshot above.