Introduction
The other advantage is that Microsoft Teams will keep a record of every version of the document, so accidental changes can be reverted. See the following document:
In addition, files which are accidentally deleted can be restored, providing that restoration takes place within 30 days (this assumes we have no additional backup software in place – additional backup software would provide us with the ability to retrieve files deleted way before the last 30 days).
Users may be concerned about the quantity of disk space this may use. This is not a concern, because the files are not all physically copied to the local computer – the user gets a virtual view and the file is only downloaded when it is needed, e.g. viewed or edited.
The other benefit of syncing files in this way is that it is far easier to share files with users external to the organisation. This is discussed in the following document:
Sharing links to Teams Files with Users outside Speakeasy in HowTo Guides
Instructions
Speakeasy…General Files
In teams, navigate to the Speakeasy…General channel and select Files. When the following screen appears, click the “Sync” button:

A folder “Speakeasy – General” will appear in File Explorer under the Busy Speakeasy icon. See the screenshot at the end of this document.
The above operation can be repeated for other major File repositories in Microsoft Teams, as discussed below. Note that some users may not have access to all of these folders, so only execute the operations for those which the user can see:
Speakeasy… Administration Files
In Teams, navigate to the Speakeasy…Administration channel and select Files, then click the “Sync” button. A folder “Speakeasy – Administration – Administration” will appear in File Explorer under the Busy Speakeasy icon. See the screenshot at the end of this document.
Speakeasy…Member Information Files
In teams, navigate to the Speakeasy…Member Information channel and select Files, then click the “Sync” button. A folder “Speakeasy – Member Information – SLT Manchester” will appear in File Explorer under the Busy Speakeasy icon. See the screenshot at the end of this document.
Speakeasy… Speakeasy Evaluation Project Files
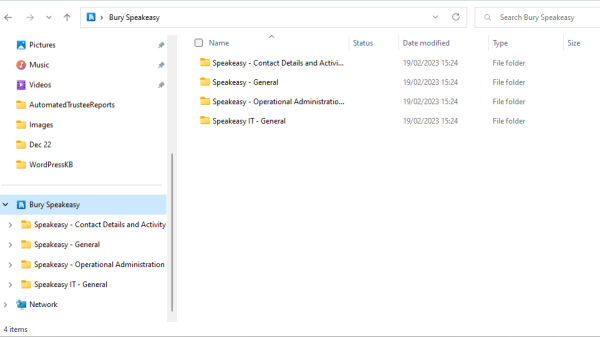
In teams, navigate to the Speakeasy…Speakeasy Evaluation Projects channel and select Files, then click the “Sync” button. A folder “Speakeasy – Speakeasy Evaluation Projects – Speakeasy Evaluation Projects” will appear in File Explorer under the Busy Speakeasy icon. The screenshot below, shows File Explorer with access to all four synced folders: