Configuring a new shared contacts folder
For Speakeasy, a shared contacts folder has already been created. The steps in this article are reproduced here in case an administrator needs to create another shared contacts folder, e.g. with specific categories of contact (such as for a future conference).
For details on how to add, edit or delete a shared contact, navigate to the following article: Creating and Maintaining Shared Contacts in Outlook
Creating the folder
In Microsoft Outlook, click the folders button down the left hand side of Outlook – it is usually the bottom-most icon (a square containing four smaller squares). See below:
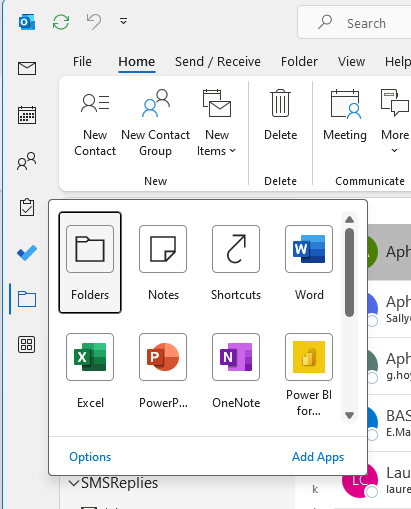
Next, click the “Folders” icon. Navigate to “Public Folders…All Public Folders…Speakeasy”.
Note: the top-level “Speakeasy” public folder was already created by an administrator by navigating to the following web location and adding a new folder called “Speakeasy”: Public Folder Creation. There is no obvious need to create a second public folder structure, but this can be done if absolutely required.
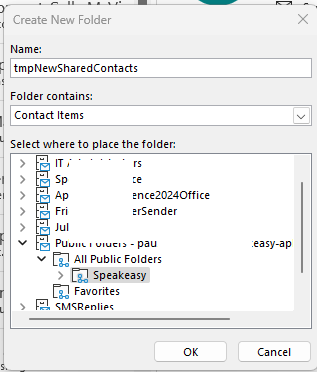
Create a new folder – one has already been created called “SharedContacts”. Give the folder a suitable name, a specify that the folder should contain “Contact Items”. Click “Ok” to save the folder. See the screenshot below for an example which creates a new shared contacts folder called “tmpNewSharedContacts”.
Making the folder available in the Outlook address book
The shared contacts folder needs to be made available to Outlook users via the Outlook address book. To do this, right mouse click on the folder and select the “Outlook Address Book” tab. Ensure the “Show this folder as an email Address Book” option is checked. See the screenshot below:
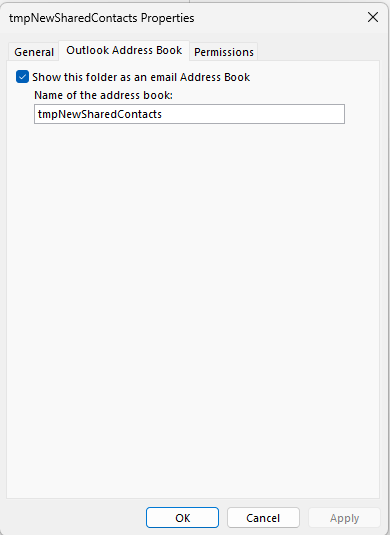
Click the “Ok” button to save the settings.
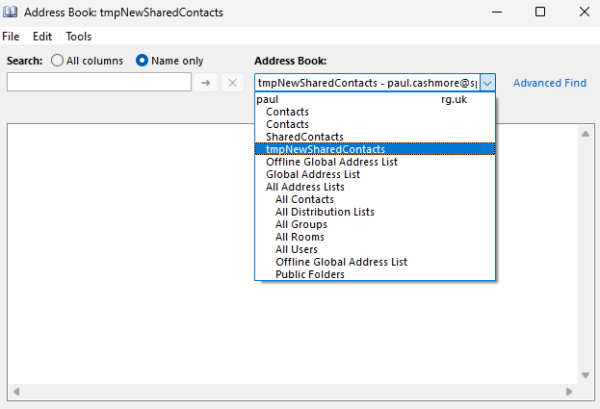
To verify that the new shared contacts folder can be seen in the Outlook address book, click the “Home” tab in Outlook and select the “Address Book” option from the Outlook toolbar. The newly created folder should be visible in the “Address Book” drop-down list. See below:
Assigning folder permissions
Right mouse-click on the newly-created folder and select “Properties”. Navigate to the “Permissions” tab. See below:
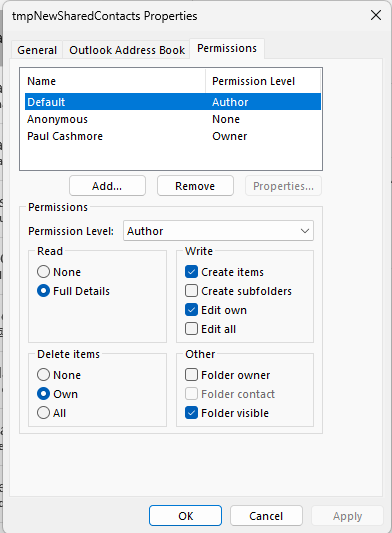
Assign permissions to other users by clicking the “Add” button. Pick users from the “All Users” contacts – this is a list mainly of Speakeasy staff – it is really only these users who should have any access to shared contacts.
Pick a name of a staff member, then click the “Add” button. Repeat for each required staff member, then click “Ok” . Change the “Permission level” setting – typically, each staff member should be given the “Publishing Editor” permission level.
Click “Ok” to save the permissions. Refer to the existing “SharedContacts” folder for example permissions.
Deleting a Shared Contacts Folder
Important: deleting a shared folder will delete it for all users. Make sure that you are aware of the consequences before performing any delete operations.
In Microsoft Outlook, click the folders button down the left hand side of Outlook – it is usually the bottom-most icon (a square containing four smaller squares). See below:
Next, click the “Folders” icon. Navigate to “Public Folders…All Public Folders…Speakeasy”.
Select one of the folders that lie under the “Public Folders…All Public Folders…Speakeasy” folder. Perform a right mouse click and select “Delete Folder”.