Introduction
Outlook typically stores contacts separately for each user – this can be problematic. e.g. if one user is told that someone’s contact details have changed, they may update their copy of the contact details with the changes, but another user may be unaware of the change so there details become out of date as they are not updated. By maintaining a list of shared contacts, everyone has access to the same details and any changes are immediately available to all. This article explains how to update or add a contact and how to update shared distribution lists containing contact details.
Configuring a Shared Contacts Folder
A shared contacts folder has already been created for Speakeasy. However, for administrators who need to understand how a new shared contacts list can be configured, refer to the following article: Configuring a new shared contacts folder
Adding New Shared Contacts
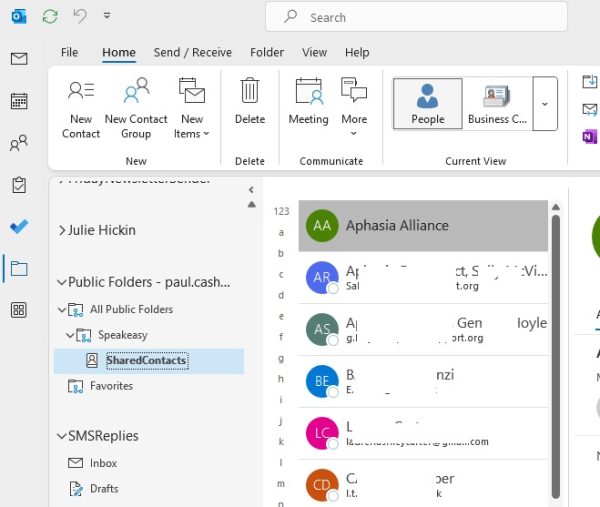
To add a new shared contact, simply navigate to the “Public Folders…Speakeasy…SharedContactsFolder”. This can be done as follows:
In Microsoft Outlook, click the folders button down the left hand side of Outlook – it is usually the bottom-most icon (a square containing four smaller squares). See below:
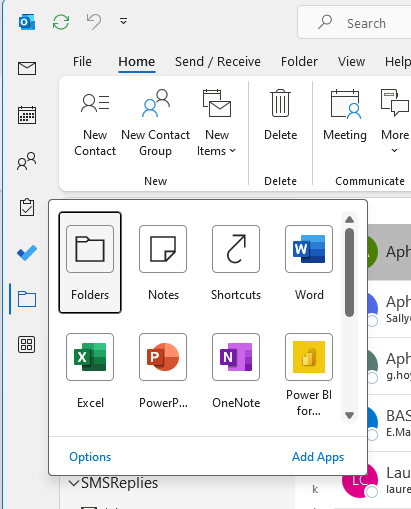
Next, click the “Folders” icon. Navigate to “Public Folders…All Public Folders…Speakeasy”.
To add a new contact, click the “New Contact” toolbar button located towards the top of the screen. Enter name and email details, plus any other contact details as appropriate – see the example screen below:
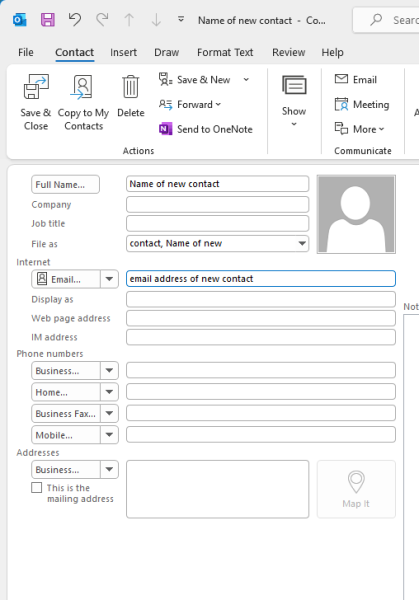
Click the “Save and Close” button.
To verify that the new contacts is available in the Outlook address book, click the “Home” tab in Outlook and select the “Address Book” option from the Outlook toolbar. From the “Address Book” drop-down list, select “SharedContacts”. The newly created contact should be visible in the list of contacts.
Modifying a Shared Contact
A shared contact may occasionally need to be modified, e.g. if their email address has changed.
It is not possible to edit a contact directly via the address book, so to edit the shared contact details, navigate to the SharedContacts folder as specified in the “Adding New Shared Contacts” section above. Double-click on the contact that requires editing, make any changes as required and click the “Save and Close” button.
Deleting a Shared Contact
If a contact needs to be deleted, navigate to the SharedContacts folder as specified in the “Adding New Shared Contacts” section above. Double-click on the contact that requires editing, make any changes as required and click the “Delete” button.
Creating a Shared Contact Group (similar to a distribution list)
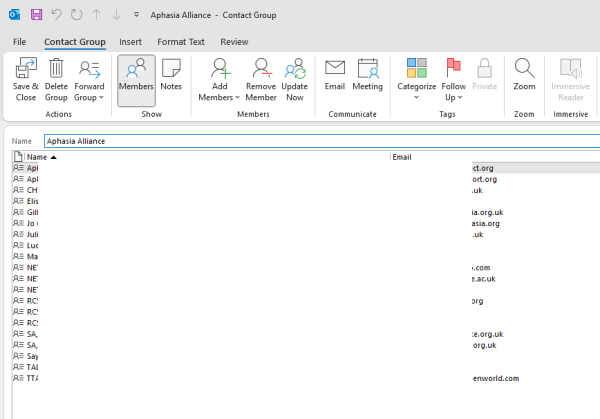
One or more contacts can be added to a shared contact group so that an email can be sent to them simply by specifying the name of that group in the “To” field of an email message. There is an existing contact group, AphasiaAlliance, which group can be seen from the Outlook address book. This group has almost approximately twenty members.
To create a shared contact group, first navigate to the SharedContacts folder by following the instructions given in the “Adding New Shared Contacts” section above.
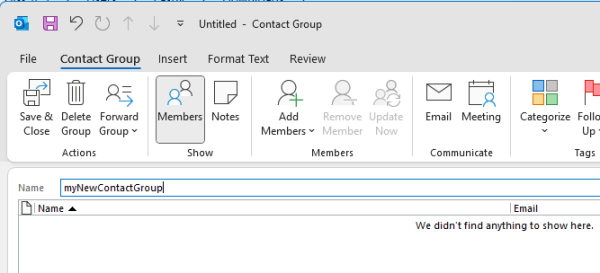
The Outlook toolbar should then display a “New Contact Group” toolbar button. See below:
Click the “New Contact Group” toolbar button, and give the contact group a suitable name.
Adding Members to a Shared Contact Group
Click the “Add Members” button (see the previous screenshot) and select the option “From Address Book”. Add any members to the group by double-clicking on a contact. The group can include any type of contacts – they can be from the shared contacts, Speakeasy staff members or any other contact, as it is the contact group that will be shared.
To add different types of contacts, modify the value of the “Address Book” dropdown list. e.g. selecting “All Users” will typically show most of the Speakeasy staff. The screenshot below shows the “Aphasia Alliance” contact group, with approximately 20 members (the details have been obfuscated)
Click “Ok” to save the changes, then click “Save and Close” to save the changes to the contact group.
Deleting Members from a Shared Contact Group
Navigate to the shared contacts folder. Double-click on the name of the shared contact group. A list of members will then be shown (see the previous screenshot). Select one or more members and click the “Delete” button.
Click “Save and Close” to save the changes.
Deleting a Shared Contact Group
Shared contact groups can be deleted in the same way as a shared contact. To delete a shared contact group, first navigate to the SharedContacts folder by following the instructions given in the “Adding New Shared Contacts” section above.
Select the name of the shared contact group and click the “Delete Group” button.
A Note on Personal Contact Groups
Whilst there is a “Groups” button in the top-level toolbar of Outlook, this is for personal contact groups only, and these won’t be shared to other Speakeasy users, so it is not recommended to use this unless a user specifically wishes to create a private group (they can also create a group with organisational visibility, but again, this over-complicates matters and a single means of creating shared groups is favourable.